Rapid deployment
Now that you’ve tested your step locally, it’s time to deploy to the pinexq.net server!
Deploying your step
Section titled “Deploying your step”While the template main.py is on the root level of your project directory, this isn’t necessary, as the previous example suggests.
However, in order to deploy your new step, you will need to edit pinexq.toml to point to it.
For example:
[project]name = "test-project"pinexq_endpoint = "jobs.api.pinexq.net"entrypoint = "src/small_step.py"
[deployment]resource_preset = "Small"max_replicas = 1
To deploy your step, you then can run the following in your project’s root directory:
foo@bar: ~/my_project$ uvx --from pinexq-cli@latest deploy --api-key="<PINEXQ_API_KEY>"The CLI will then use the Dockerfile to build a worker, then upload it to our servers. Note that this upload can only happen once for a given function:version combination; if you need to re-upload your Step (e.g. due to a typo), you will need to either delete the existing function on your portal, or change the version.
Your first job
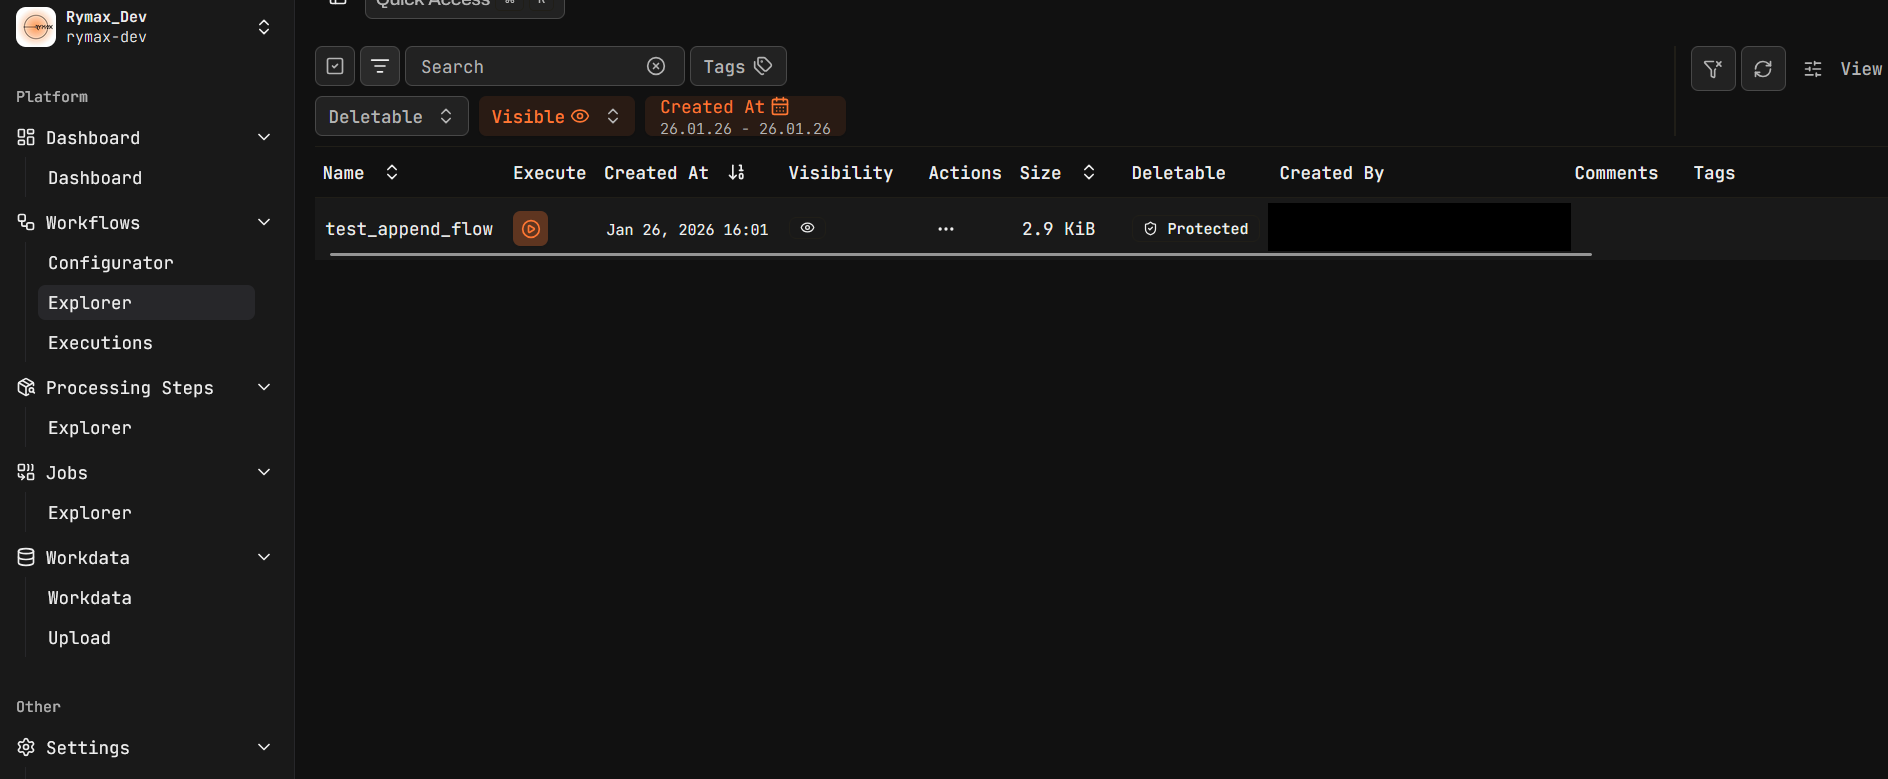
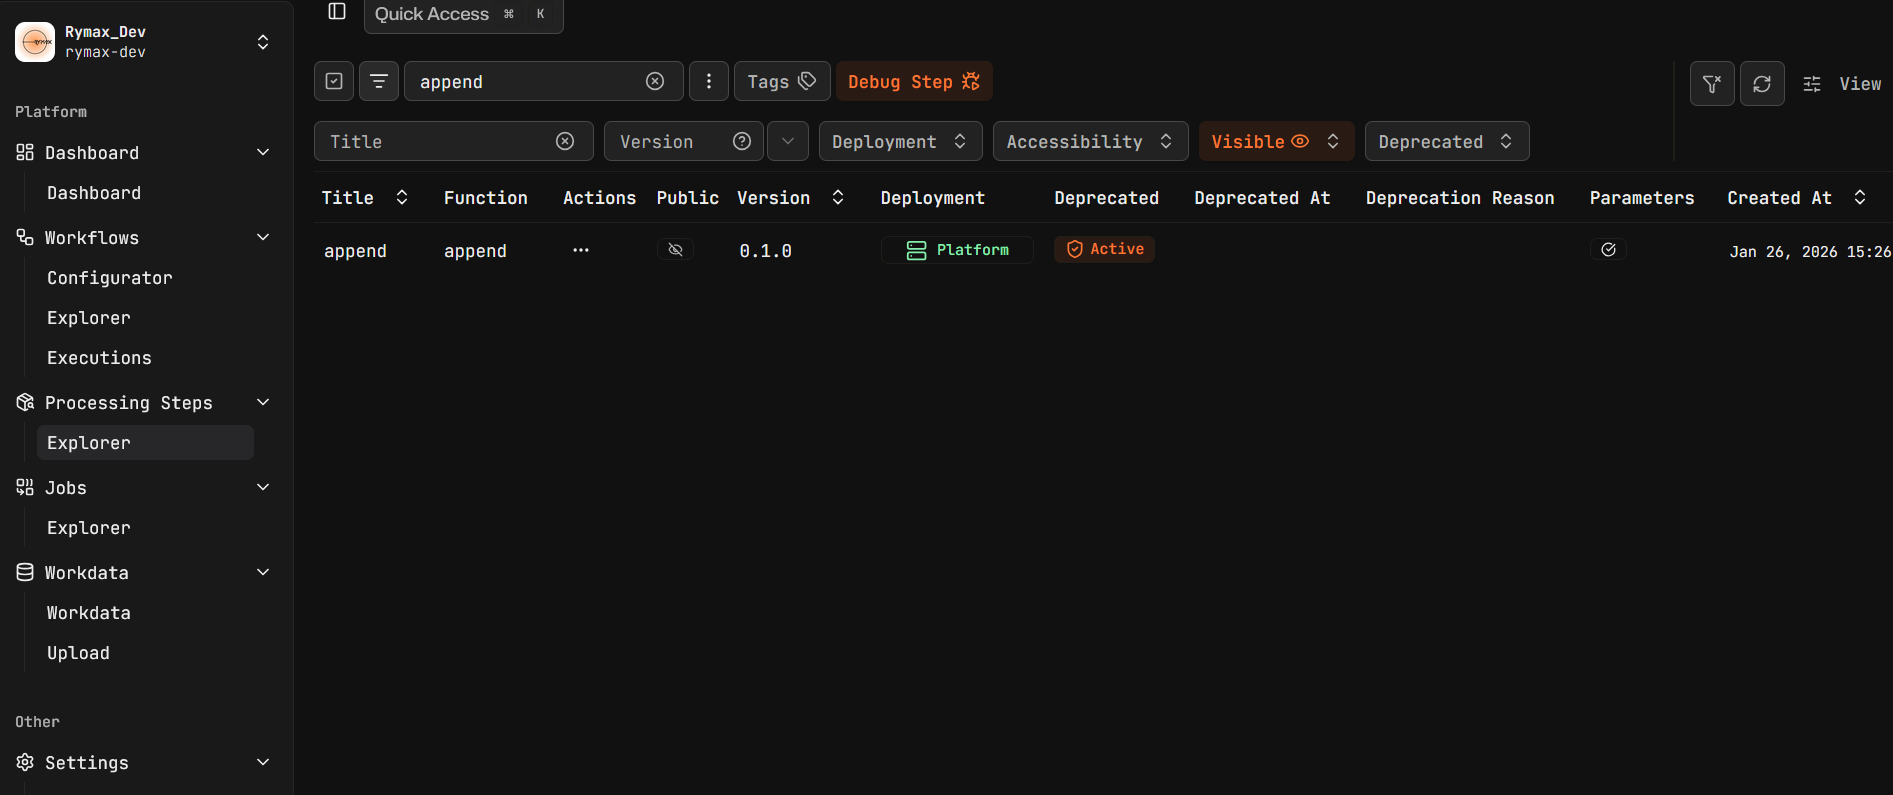
Section titled “Your first job”On the Portal, under Processing Steps, you should now see your processing step, as well as any others made available to you.
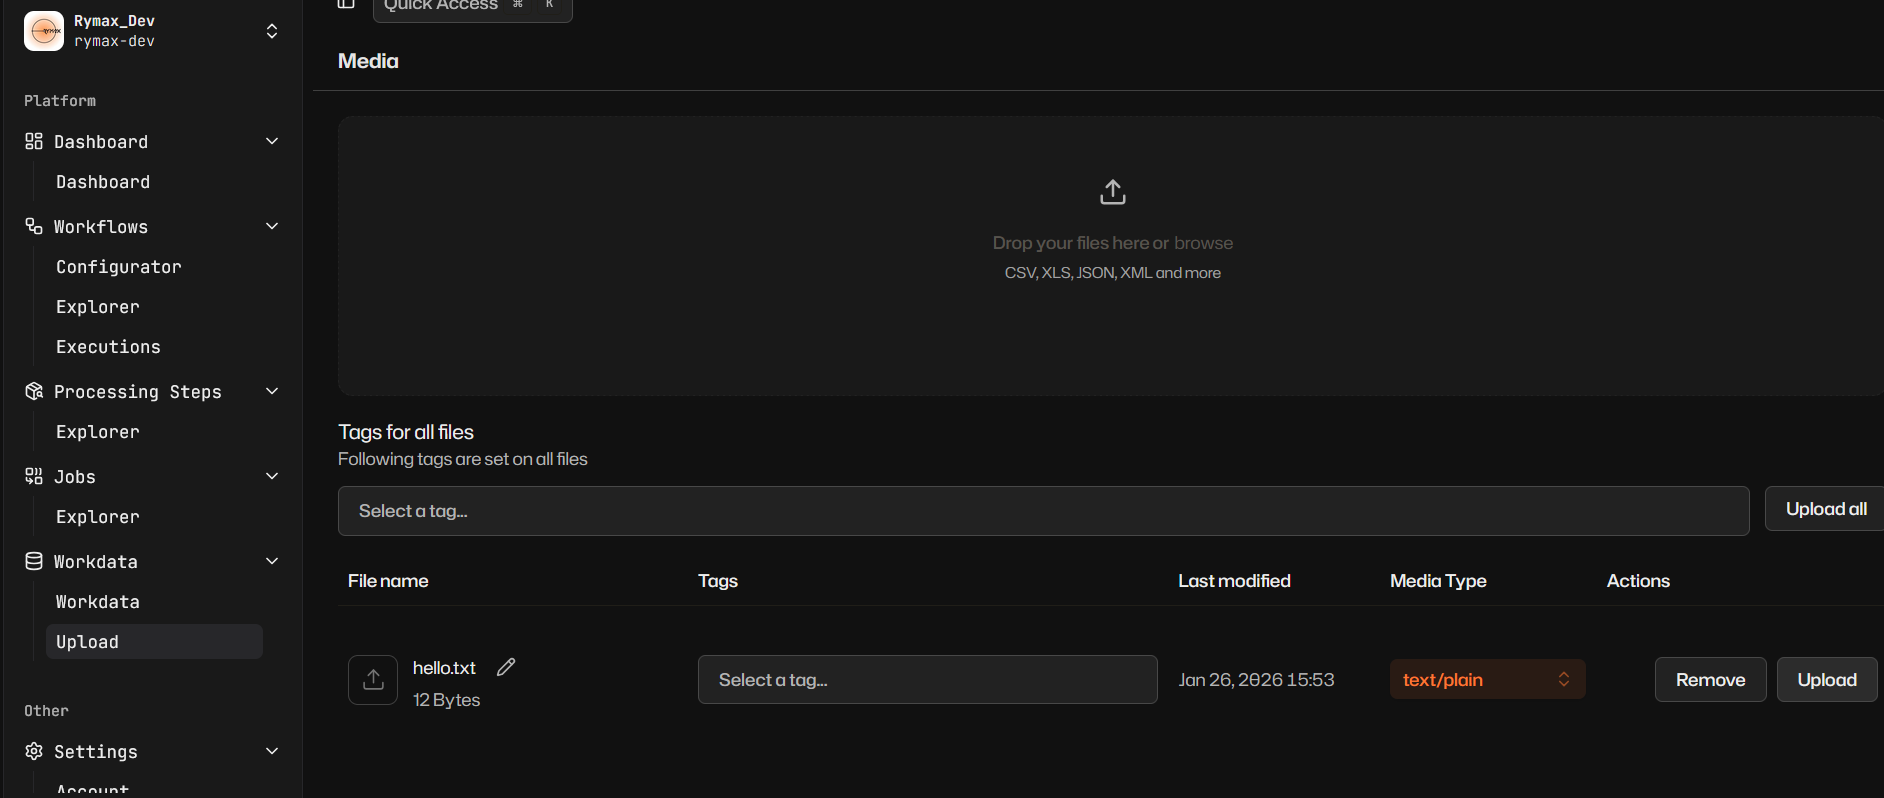
Since your step takes file input, your next step is to upload your WorkData file.
Finally, navigate to Jobs, and “Create job”. You will then be able to name your test job, and assign it your ProcessingStep.
Don’t start it yet! Leave “Start immediately” unchecked, and click “Create”. You will then be able to navigate to your job’s details.
On the job’s page, scroll down and configure the inputs and parameters of your Step.
When you’re ready, scroll back up and click the “play button” to start.
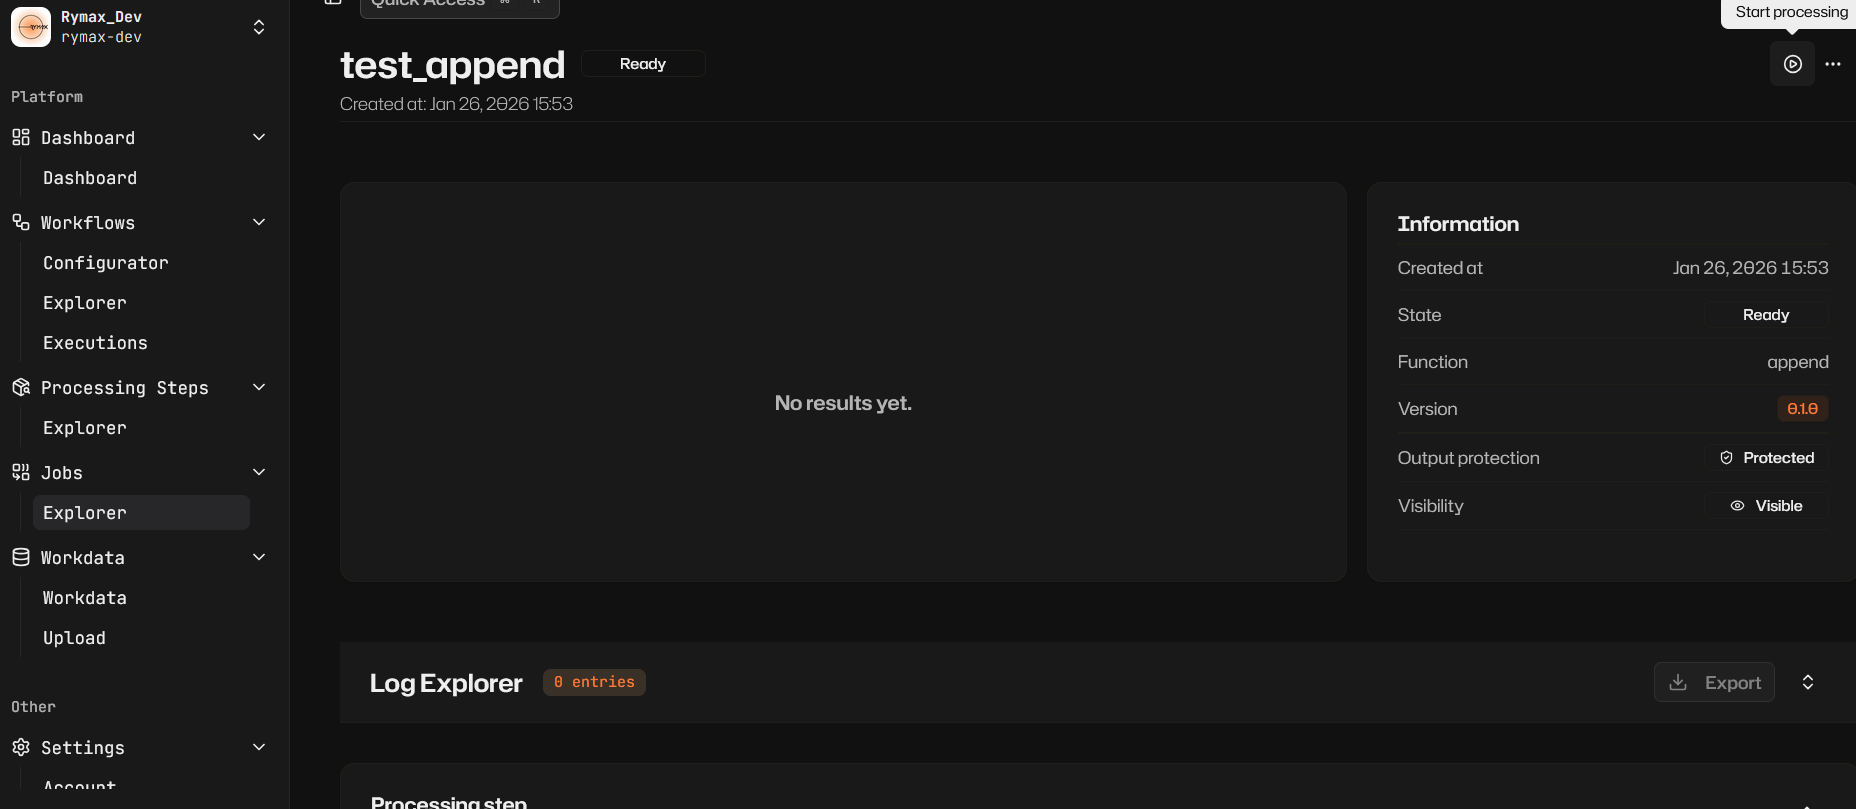
In less than a minute, your job will finish, and you can view the result down below (or in Workdata).
Workflows
Section titled “Workflows”Our low-code workflow configurator lets you configure workflows with a minimum of coding knowledge. Using it, you can simply click and drag to “glue together” different steps.
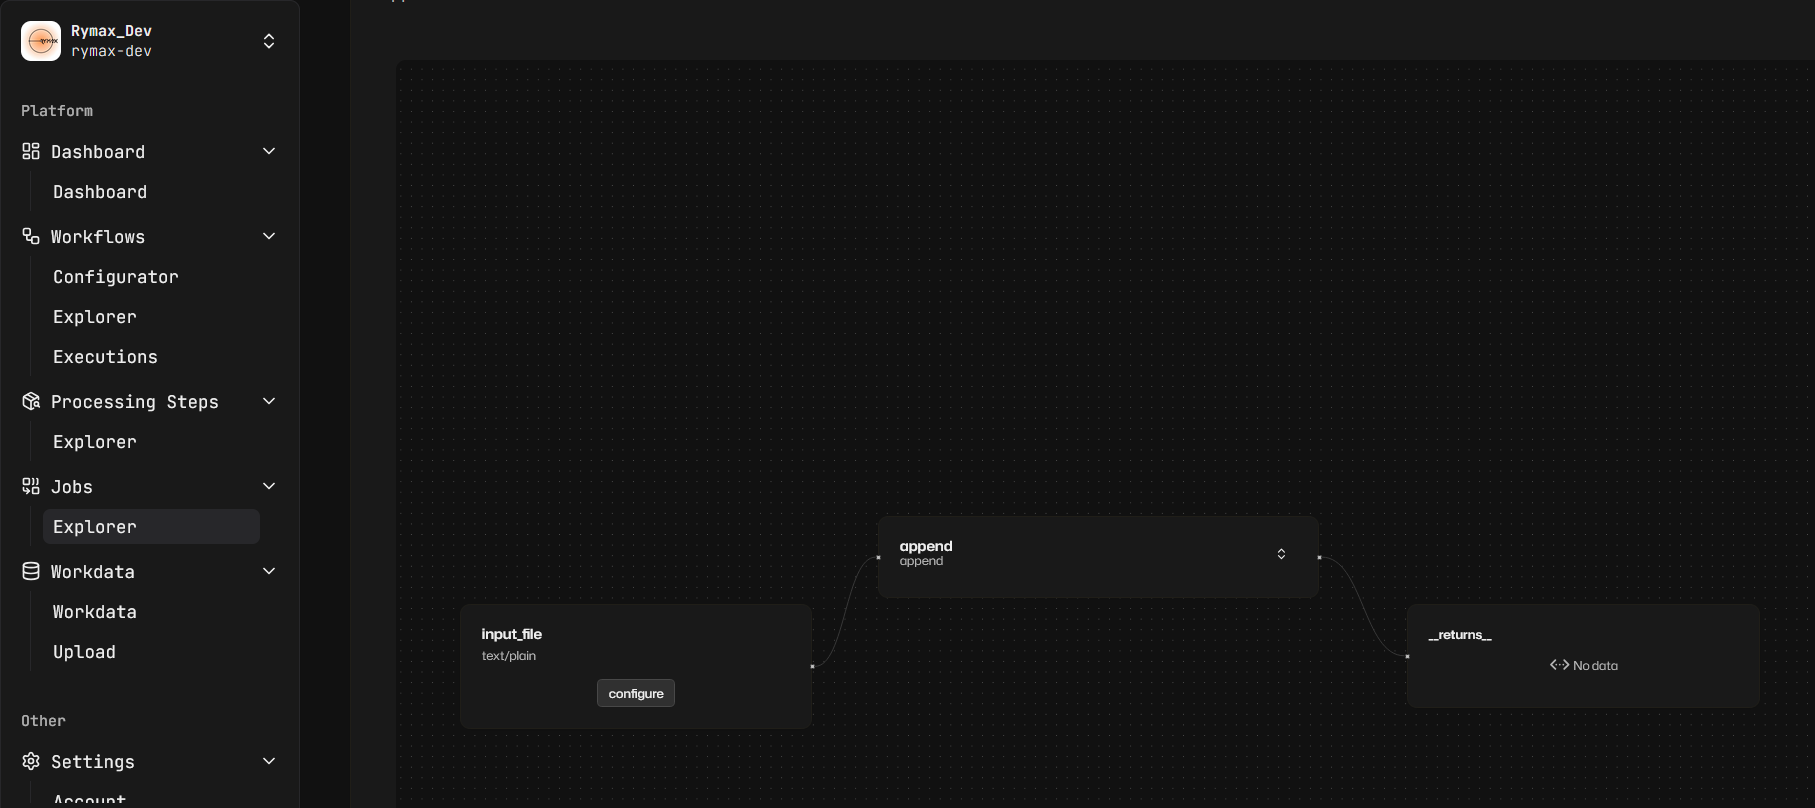
First, drag out a DataExplicit from the toolbar at the bottom, and configure it to use your input file.
Then, drag in a ProcessingStep, configure its parameters, and connect it. You can connect several instances of your step together. Try it!
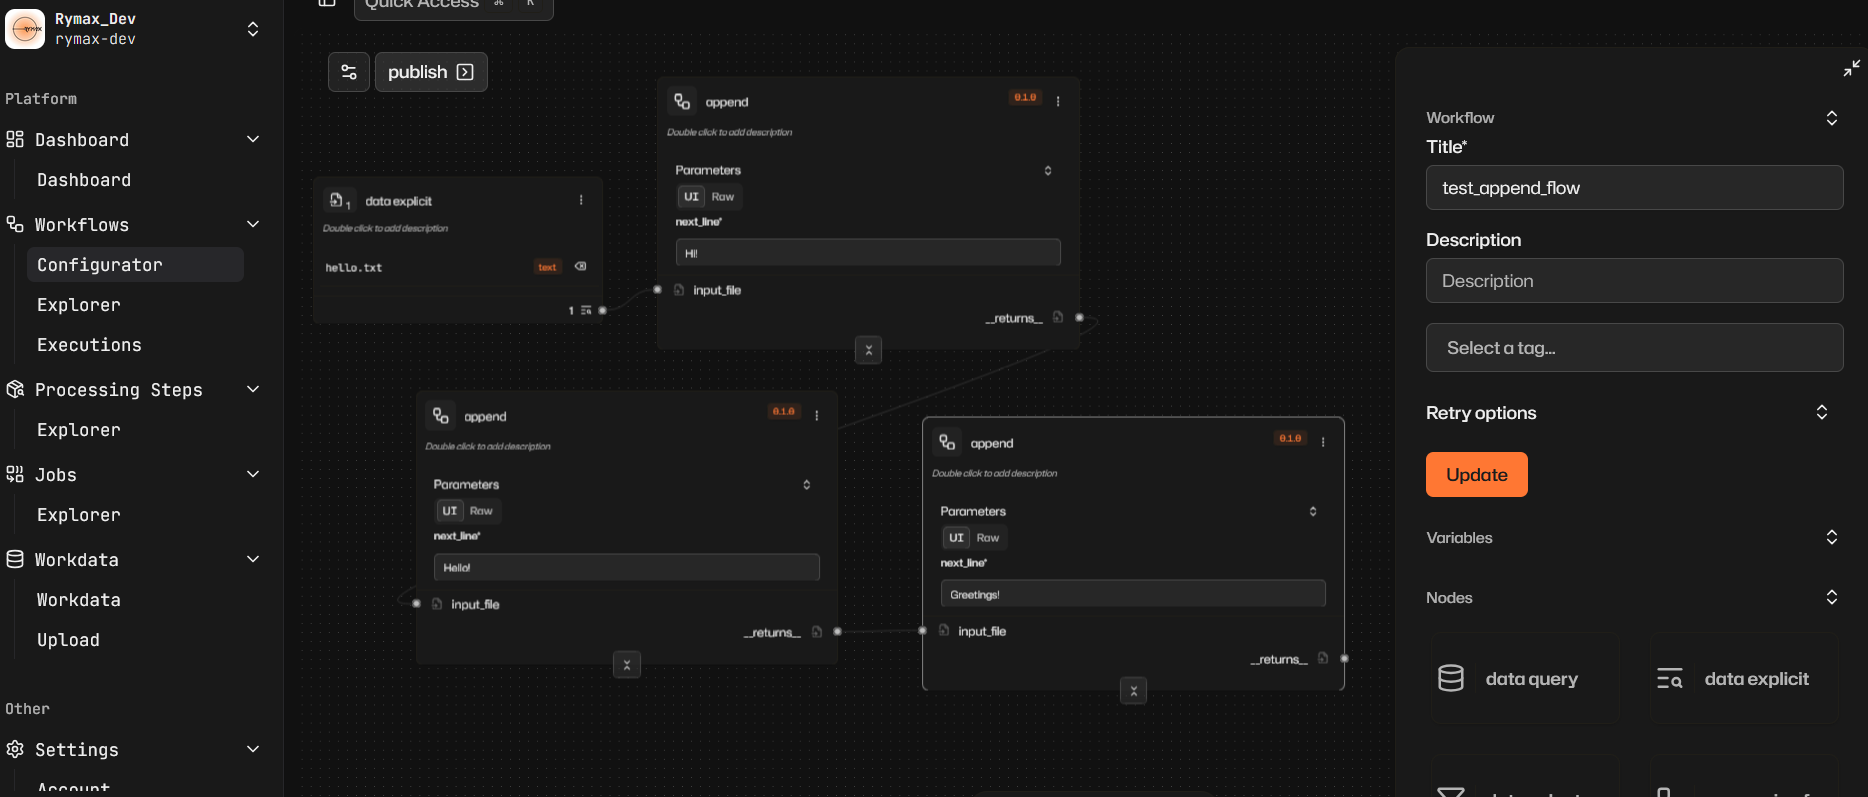
Next, save your work, then click “Publish.”
Finally, go to the workflow explorer and try running it!